How to Vinyl Wrap Different Parts of a Car (2026 Guide)
Learn how to vinyl wrap car bumpers, mirrors, and corners with our step-by-step DIY guide. Master the techniques for a professional finish on every part.
Whether you are looking to save money on a full transformation or just want to add custom accents like a carbon fiber roof or blacked-out mirrors, learning how to wrap specific car parts is a valuable skill. However, wrapping a flat hood is vastly different from tackling a complex front bumper or a spherical side mirror.
In this guide, we break down the professional techniques for wrapping the most challenging parts of a vehicle, ensuring a seamless finish that lasts.
Essential Tools for Every Part
Before you start, ensure you have the right equipment. Using the wrong tools is the fastest way to overstretch vinyl or damage your paint.
* Heat Gun: For making the vinyl pliable.
* Squeegee: With a felt edge to prevent scratching.
* Precision Knife: With breakaway blades for constant sharpness.
* Tack Cloth & Isopropyl Alcohol: For 100% decontamination.
* Knifeless Tape: Essential for clean lines without cutting the paint.
1. How to Wrap Flat Panels (Hood, Roof, Trunk)
Flat or slightly curved panels are the best place for beginners to start.
- Preparation: Clean the surface and the underside of the edges meticulously.
- Positioning: Lay the vinyl over the panel with the backing paper still on. Use magnets to hold it in place.
- The "Glass" Effect: Peel the backing and pull the corners of the vinyl taut to create a smooth, wrinkle-free surface (this is called "glassing" the panel).
- Squeegee Technique: Work from the center outward in overlapping strokes.
- Trimming: Use knifeless tape or a steady hand to trim the excess, leaving about 1/2 inch to tuck under the edges.
2. How to Wrap Side Mirrors
Mirrors are often considered the most difficult part of a car due to their deep recesses and spherical shape.
* The Inlay Technique: If the mirror has a sharp body line, it is often better to use two pieces of vinyl. Apply a small piece (inlay) in the deepest recess first, then overlap the main piece on top.
* Cold Pre-Stretch: Stretch the vinyl *before* applying heat. Once you apply the vinyl to the mirror and add heat, the vinyl will actually shrink back and "hug" the curves of the mirror, preventing the edges from peeling later.
* Relief Cuts: If the vinyl starts to bunch up, make small "relief cuts" in the waste material to release the tension.
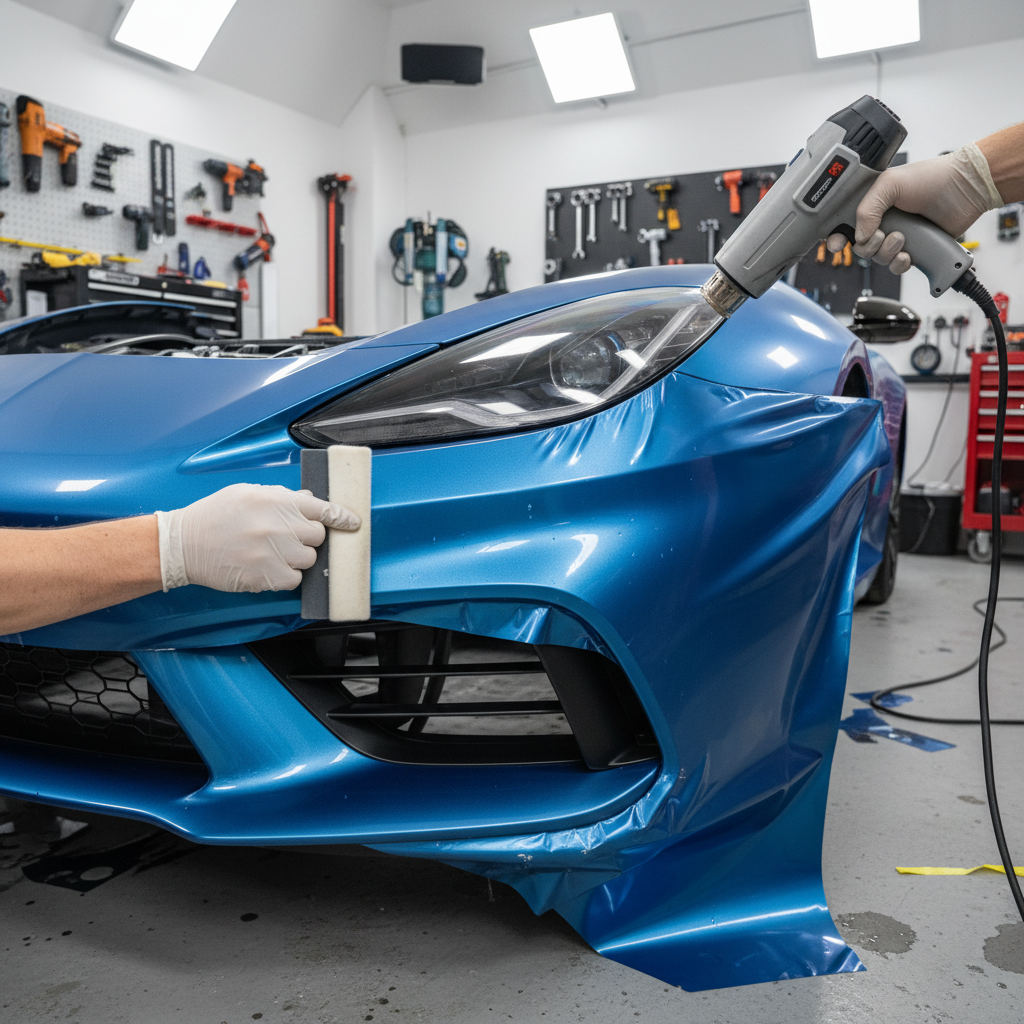
3. How to Wrap Bumpers and Corners
Bumpers are complex because they combine flat surfaces, deep fog light pockets, and sharp corners.
| Challenge | Professional Solution |
|---|---|
| Deep Pockets | Use inlays to avoid overstretching the vinyl beyond its 10-15% limit. |
| Sharp Corners | Use "triangles" of tension. Pull the vinyl away from the corner, heat it, and let it shrink around the edge. |
| Wheel Wells | Clean the inner fender lip thoroughly; this is where most wraps fail first due to road grime. |
Pro Tip: Always use Post-Heating. Once the bumper is wrapped, run your heat gun over all the edges and recessed areas to reach the vinyl's "thermal set" temperature (usually around 175°F-200°F). This "kills" the vinyl's memory so it stays in its new shape.
4. Wrapping Door Handles and Trim
For a professional look, it is almost always better to remove the door handles before wrapping.
- Removal: Most modern cars have a single bolt inside the door jamb that releases the handle.
- Seamless Wrap: Wrapping the handle off the car allows you to tuck the vinyl into the internal mechanisms so no original paint shows through.
- Chrome Delete: For window trim, use knifeless tape along the rubber gaskets to get a factory-perfect edge without risking a blade near your window seals.
Should You DIY or Hire a Pro?
While wrapping small parts like an interior console or a roof is an achievable weekend project, complex bumpers and full vehicles often require professional expertise to avoid "fingering" (wrinkling) and premature peeling.
If you find yourself struggling with deep recesses or complex curves, it might be time to consult a professional. You can search for local installers on TheWrapMap or use our cost calculator to see if a professional install fits your budget.
Summary Checklist for a Perfect Finish
* Never overstretch: Stretching vinyl more than 20% will cause color fading (whitening) and failure.
* Temperature matters: Work in a clean garage between 65°F and 75°F.
* Post-heat everything: This is the difference between a wrap that lasts 5 years and one that peels in 5 days.
Frequently Asked Questions
What is the hardest part of a car to vinyl wrap?
Side mirrors and complex front bumpers with deep air intakes are widely considered the hardest parts to wrap. They require advanced techniques like 'cold pre-stretching' and the use of 'inlays' to prevent the vinyl from overstretching and peeling.
Can you wrap a bumper in one piece?
Yes, but it is not recommended for deep recesses. If you stretch vinyl into a deep pocket, it will eventually 'pop' out. Instead, apply a small strip of vinyl (an inlay) in the deepest part first, then overlap the main piece of vinyl over it for a seamless, durable look.
How important is post-heating when wrapping car parts?
Post-heating is the process of heating the finished wrap to a specific temperature (usually between 175°F and 200°F) to lock the vinyl into its new shape. This 'kills' the vinyl's memory, ensuring it doesn't try to shrink back to its original flat form and peel off the vehicle.